
Give your location its own email address for vendor invoices, or connect the Gmail or Outlook inbox where they already arrive.
Many vendors email a PDF invoice after each delivery. Once Mail is set up, RestaurantMate picks up those PDFs from the vendor reps you list, reads every line and files the invoice in Purchasing. Price sheets and bills that arrive by email are filed too.
The examples use the demo restaurant Juniper Kitchen · Main Street. Riverside Dairy and Valley Fresh Produce email their invoices there.
Words used in this article
- RestaurantMate inbox: an email address for your location that ends in
@mail.rmate.ai. You give it to your vendors. Some buttons in the app use the short name "RMate inbox". - Connected mailbox: your own Gmail or Outlook account, linked so RestaurantMate can read vendor emails in it. The access is read-only. RestaurantMate can read emails, and it can't send, delete or move them.
- Rep: a contact at a vendor, such as a sales rep or the billing office. In RestaurantMate a rep is a name and an email address tied to one vendor.
- Sender: a rep's email address that you tell RestaurantMate to watch. Only emails from your senders are imported.
- PDF: the file type most vendors use for invoices. From email, RestaurantMate imports PDF attachments only.
- Price sheet: the price list a vendor sends out. A credit memo is a document where the vendor gives you money back on an invoice.
Before you start
Who can do this. Owners can do every step. So can people whose role has Edit on Mail. The built-in Admin and Location manager roles have it. People with View on Mail can read the emails and see what was imported, but they can't set anything up. If a button is greyed out, hover over it to see what's missing. See Give each person only the pages they need.
What you need:
- The address each vendor's invoices come from. Open a recent invoice email and copy the address in the From line. It is often a billing address, such as
billing@riversidedairy.example, and not your rep's own address. - To connect Gmail or Outlook, the sign-in for the mailbox where invoices arrive today.
Choose one way, or use both.
| RestaurantMate inbox | Gmail or Outlook | |
|---|---|---|
| Good for | New vendors, or keeping invoices out of your own inbox | Vendors who already email invoices to you |
| What you do | Give the new address to your vendors | Sign in to Google or Microsoft once |
| How fast invoices show up | Usually within a minute | Within about two hours |
| Older invoices | Only emails sent after you create it | Scan looks back up to a year |
Both ways import only from the senders you list.
Is your location still being set up? If every page sends you to the Welcome to RestaurantMate screen, use its Email card. It asks "Connect the inbox where vendor invoices arrive?" and offers Connect Gmail, Connect Outlook and Not now. If you'd rather not connect an inbox, you can use a RestaurantMate inbox once the location is set up. See Tell us about your location.
Step 1: Open Mail
- In the sidebar, under Business, click Mail.
- The first time, the page says "Bring vendor mail into Juniper Kitchen · Main Street" and shows two cards, Connect an existing mailbox and Create an RMate inbox. Use one or both. You can add the other one later.
Step 2a: Create your RestaurantMate inbox
- On the Create an RMate inbox card, look at Dedicated email address. RestaurantMate fills it in from your location's name. Change the part before the @ if you want something shorter. Juniper Kitchen uses
mainstreet@mail.rmate.ai. - Click Create inbox. A message confirms "Inbox created: mainstreet@mail.rmate.ai".
- Click Copy address in that message. The address also stays in Mail's left column, under RMate inbox.
- Send the address to each vendor rep and ask them to email invoices and price sheets there. RestaurantMate doesn't contact your reps, so this message comes from you.
Emails sent to the address show up in Mail within about a minute. They are imported only after you add their sender in Step 3.
Setting up a second location? You can share one address. When you open Mail at Juniper Kitchen · Riverside, the inbox card reads Use an RMate inbox, with the line "Share the address your other locations already give to vendors, or create a new one." Click Use this inbox next to Main Street's address, or create a new address for Riverside.
With a shared address, every email reaches both locations. Each location imports only from the senders added at that location. A vendor that delivers to both locations needs a sender at both.
Step 2b: Connect Gmail or Outlook
- On the Connect an existing mailbox card, click Connect Gmail or Connect Outlook. If Mail is already set up, click the + (Add mailbox) in Mail's left column and pick Connect Gmail or Connect Outlook.
- Sign in to Google or Microsoft with the account where vendor invoices arrive. Allow RestaurantMate to read your mail. The access is read-only, so RestaurantMate can't send, delete or move anything.
- You come back to Mail with the message "Gmail connected. Vendor mail will appear here shortly." (Outlook says the same with its own name.) The account now shows in the left column by its address, for example
orders@juniperkitchen.example.
If you connect Gmail or Outlook and skip the RestaurantMate inbox, Mail shows a banner that offers Create inbox. You can dismiss it.
Step 3: Add the senders to import
RestaurantMate imports nothing until you add senders. The sender list tells it which emails are vendor documents and which vendor each one belongs to.
- In Mail's left column, click Auto-import senders. The window says "Emails from these senders are watched, and attached PDFs become source documents for this location."
- Click Add sender.
- Mailbox: pick where this vendor's emails arrive. That's your RestaurantMate inbox or a connected Gmail or Outlook address.
- Documents: pick what to import from this sender.
- All: invoices, receipts and price sheets.
- Invoices: invoices and receipts only.
- Prices: price sheets only.
- Rep: pick the vendor's rep. If the rep isn't in the list, click Add rep and fill in the vendor, name, email and role. For a billing office, the role is AR / billing (AR means accounts receivable, the team that sends invoices).
- Check Vendor and Sender email. They fill in from the rep you picked.
- Click Add sender. You'll see "Email sender added."
Repeat for each address your vendors send from. A sender watches one mailbox. If a rep emails both your RestaurantMate inbox and your Gmail, add a sender for each mailbox.
Here is part of Juniper Kitchen's list:
| Sender | Vendor | Documents |
|---|---|---|
| billing@riversidedairy.example | Riverside Dairy | All |
| billing@valleyfresh.example | Valley Fresh Produce | Invoices |
| dana@valleyfresh.example | Valley Fresh Produce | Prices |
Valley Fresh Produce sends invoices from its billing office and a weekly price sheet from Dana, the sales rep, so it has two senders.
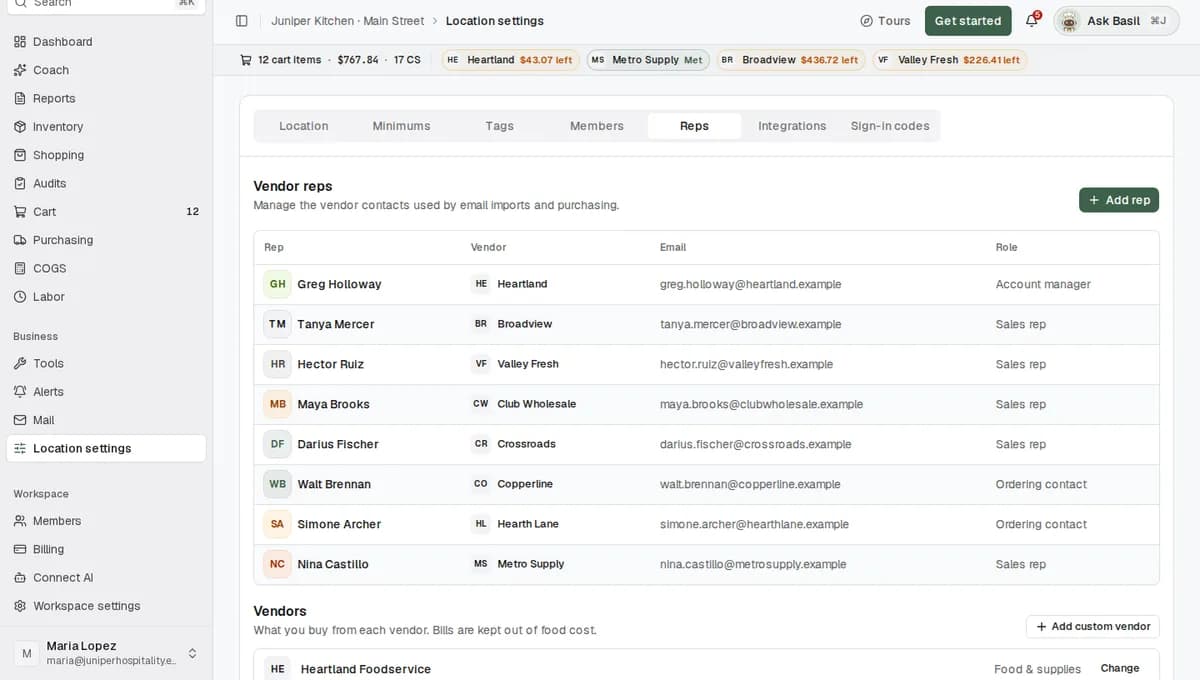
Add reps ahead of time. You can also add reps in Location settings, on the Reps tab. Click Add rep and fill in the Add vendor rep form: Vendor, Name, Email, Phone (optional) and Role. Reps you add there show up in the Rep list when you add a sender. Saving a rep sends nothing to the rep. To open Location settings you need Full access to Location settings, which owners, Admins and Location managers have.
Step 4: Bring in past invoices (Gmail and Outlook)
A Gmail or Outlook account you've used for a while already holds months of invoices. You can pull them in.
- Open Auto-import senders.
- On the sender's row, click Scan. RestaurantMate looks back up to a year and brings in up to 25 emails from that sender. You'll see "Email scan queued."
Scan works for senders on a Gmail or Outlook mailbox.
Each row also shows when that sender was last imported or seen. To stop importing from a sender for a while, click Pause. Click Resume to start again.
Step 5 (optional): Have bills emailed in
Utility, rent and repair bills can come by email too. Set the vendor up as a bills vendor first so its documents stay out of your food cost.
- Open Location settings and click the Reps tab.
- In the Vendors list, find the vendor and click Change.
- Under What do you buy from them?, pick Bills & services. Choose a Category for their bills, such as Utilities, and save. You'll see "Saved. Uploads for this vendor now go to Bills."
- Add the vendor's billing address as a sender (Step 3).
If the vendor isn't in RestaurantMate yet, add it while you add the rep. In Vendor, type the name and pick Add custom vendor, then set What do you buy from them? to Bills & services. Changing what you buy from a vendor also needs Edit on Purchasing. See Add bills and keep them out of food cost.
What happens next
Emails arrive. Emails sent to your RestaurantMate inbox show up in Mail within about a minute. Gmail and Outlook are checked every one to two hours. Each check looks at the last 30 days, and only at emails with attachments from your senders (up to 10 per sender each time).
The RestaurantMate inbox checks every email. First, the email must pass email authentication. That's a standard check (called DMARC) that proves the email really came from the company in its From line. Second, it must come from one of your senders. If either check fails, the email waits in Needs review and its attachments aren't imported. This stops fake invoices made to look like they came from your vendor.
RestaurantMate reads each PDF with AI. It works out what the document is, such as an invoice, a credit memo, a price sheet or an order confirmation. It uses only the kinds of document the sender's Documents setting allows. Every line is read and matched to your items, and your prices update. An order confirmation can also add an order to Purchasing so you can track it.
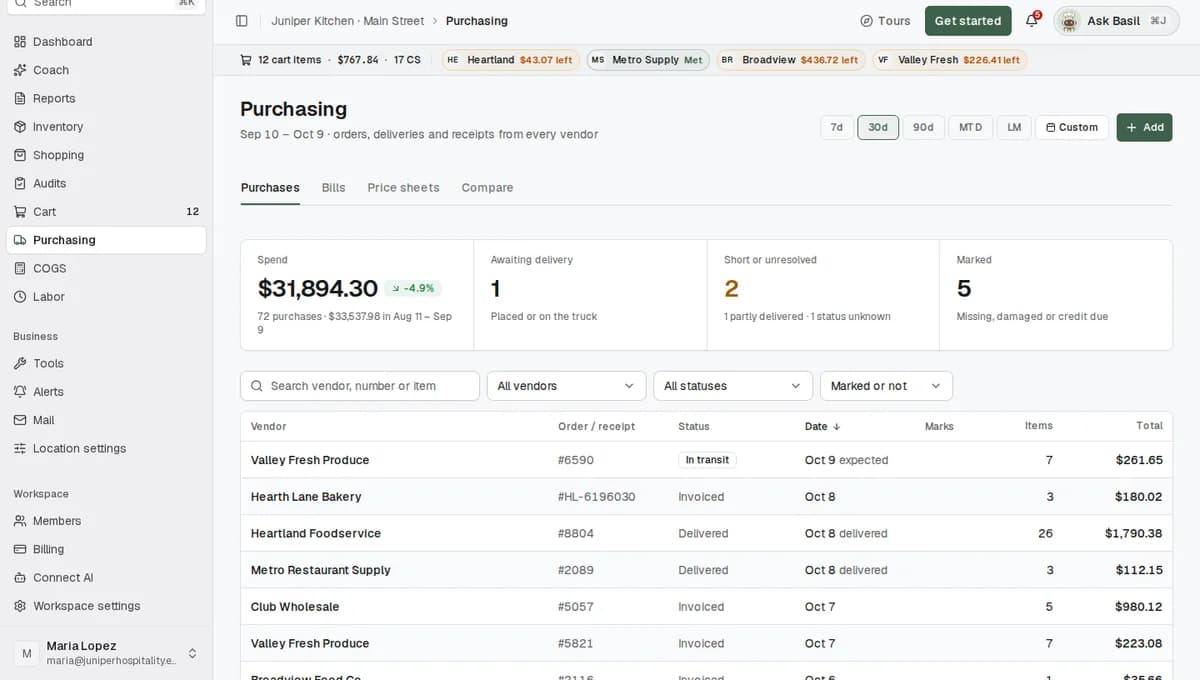
Documents land in Purchasing. Invoices and receipts go to the Purchases tab, price sheets to Price sheets, and bills to Bills. In Mail, the email's status changes to Processed. The same PDF file is never imported twice.
Prices update. Prices from these invoices and price sheets are added to your items, so you can compare them with your other vendors.
What you see in Mail
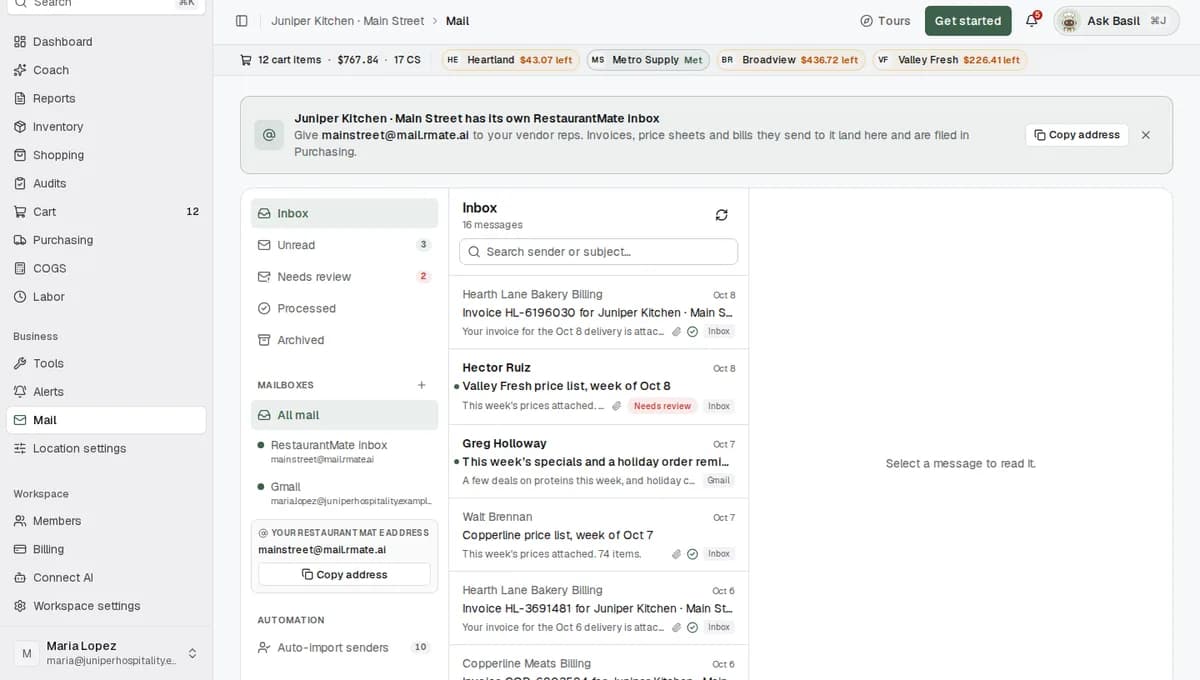
The left column has the folders Inbox, Unread, Needs review, Processed and Archived. Below them are your sources: All mail, RMate inbox and each connected Gmail or Outlook account. Search finds an email by sender or subject.
Click an email to read it. You'll see the sender, the vendor it matched, and Attachments, with a status for each file. The email itself has one of these statuses:
| Status | What it means |
|---|---|
| Processing | The attachment is being read. |
| Processed | The document was imported. You'll find it in Purchasing. |
| Needs review | The email was held and nothing was imported. The email says why. |
| No document | There was no PDF to import, for example when only a photo or a spreadsheet was attached. |
| Failed | The attachment couldn't be imported. |
Use Mark read, Mark unread, Archive and Restore to keep the list in order. Pictures inside an email stay hidden until you click Load remote images. They load privately through RestaurantMate.
Tips
- Copy the sender from a real invoice. Invoices often come from a billing address. If a vendor sends from two addresses, add a sender for each.
- Ask vendors to send to the inbox directly. If you forward invoices from your own email, your address becomes the sender. One sender can belong to only one vendor, so forwarded invoices from several vendors won't be filed under the right vendor. Connect your Gmail or Outlook instead.
- Ask for PDFs. Email imports PDF attachments up to 25 MB each. If a vendor emails photos of invoices, upload them in Purchasing with Add. For a price sheet sent as a spreadsheet, ask the vendor for a PDF copy.
- Give sales reps their own sender. A sales rep who sends a weekly price list can be a sender with Documents set to Prices. Only price sheets come in from that address.
- Look at Needs review now and then. An email from an address you haven't listed lands there. That's how you'll notice a vendor that started sending from a new billing address.
Troubleshooting
An email is in Needs review with "Waiting for a vendor sender rule." It came from an address that isn't one of your senders. Add that exact address as a sender (Step 3), and later emails from it will import. For the email that's waiting, ask the vendor to send it again, or upload the PDF in Purchasing with Add.
An email is in Needs review with "Sender authentication did not pass; review is required." The email didn't pass the check that proves it came from the company in its From line, so its attachments weren't imported. If you know the invoice is real, upload the PDF in Purchasing with Add. If it keeps happening with one vendor, contact us.
An email shows No document. There was no PDF attached. Photos and spreadsheets attached to an email are skipped. Upload photos in Purchasing with Add.
A vendor puts the invoice in the email text, with no PDF. A few vendors do this. Our team can set up those vendors so their emails are turned into a PDF and read. Contact us with the vendor's name.
Invoices from Gmail or Outlook haven't shown up. Give it up to two hours. Then open Auto-import senders and check three things. The sender should be listed for that Gmail or Outlook mailbox, and not only for the RestaurantMate inbox. The sender shouldn't be paused. Documents should include the kind of document you expected. Each regular check looks back only 30 days, so use Scan for older emails.
A mailbox in Mail's left column says Not connected, or you see Reconnect. RestaurantMate can no longer read that mailbox. Click Reconnect if you see it, or use the + in Mail's left column. Sign in with the same email address and allow access to read your mail.
Auto-import senders says "Connect a mailbox first". The location has no mailbox yet. Do Step 2a or Step 2b first.
Mail isn't in your sidebar. Your role may not include Mail, or the page may be hidden for your role. The built-in Buyer and Bookkeeper roles can read Mail, but the page is hidden for them by default. A workspace owner can turn it on in Members, on the Roles tab, under Pages they see.
Mail says "No mailboxes are connected for this location yet. Ask a manager to set one up." Your role can read Mail but can't set it up. Ask an owner, an Admin or a Location manager.
Common questions
Will RestaurantMate read all my email? No. In Gmail or Outlook, RestaurantMate looks only for emails with attachments from the senders you list. The access is read-only, so it can't send, delete or move anything. The rest of your mailbox is left alone.
Can it bring in invoices from before I set this up? From Gmail or Outlook, yes. Click Scan on a sender to look back up to a year, up to 25 emails per sender. A new RestaurantMate inbox starts empty and receives only emails sent to it after you create it.
Can my two locations use one address? Yes. At the second location, click Use this inbox to share the first location's address. Each location imports only from the senders added at that location.
Do you contact my vendors or reps? No. Adding a rep or a sender sends nothing to anyone. You tell your vendors about the new address yourself.
Can I have utility and rent bills emailed in? Yes. Set the vendor to Bills & services on the Reps tab in Location settings, then add its billing address as a sender. Its invoices are filed on the Bills tab in Purchasing and kept out of your food cost.