
Give each person one role and the locations they work at, and RestaurantMate shows them only the pages that job needs.
At Juniper Kitchen, the line cook who counts the walk-in sees the Audits page and nothing else. The bookkeeper sees the numbers and the invoices but can't order. Dev, who manages Main Street, sees everything at Main Street and nothing at Riverside. You set this up once on the Members page, and you see each person's screen before you invite them.
Words used in this article
- Workspace: your restaurant group's account in RestaurantMate. Juniper Hospitality is one workspace with two locations.
- Location: one restaurant, such as Juniper Kitchen · Main Street.
- Owner: the person who made the workspace, plus anyone they make a co-owner. Owners can do everything, including members, roles and billing.
- Role: a named set of access, such as Buyer or Bookkeeper. Everyone who isn't an owner has one role.
- Area: a part of the app that a role gives access to, such as Ordering or Labor & wages.
- View, Edit and Full: the level a role has in each area. View lets someone look. Edit lets them change things. Full adds the last step in that area, such as sending orders to vendors. Each level includes the one before it.
- Pages they see: which pages show up in the person's sidebar (the menu on the left) and in the search (Cmd+K).
- Opens on: the first page they land on when they sign in or switch location.
- Audits is the page where staff take counts. COGS (cost of goods sold) is the page that shows what your food costs you.
Before you start
- You need to be an owner. Only owners see Members in the sidebar, and only owners can invite people, change access or edit roles.
- The person's details. Their first name, last name and email. A phone number is optional.
- Their locations. Decide whether they work at every location or only some.
- Their job. Pick the built-in role closest to what they do. You can change it any time.
The built-in roles
Every workspace has these seven roles. You can't change what a built-in role can do, but you can Duplicate one to make your own version.
| Role | Use it for | Pages they see | Opens on |
|---|---|---|---|
| Admin | Everything at the locations you give them, including Location settings, alerts and the AI agent. | Everything their access allows | Inventory |
| Location manager | Running a location day to day: ordering, counts, receipts and recipes. Like Admin, but without the AI agent. | Everything their access allows | Inventory |
| Counts & purchasing | Taking counts and handling receipts and invoices. This role is picked for you when you invite someone. | Audits, Purchasing | Audits |
| Buyer | Shopping, building and sending orders, and checking receipts. | Inventory, Shopping, Audits, Cart, Purchasing | Inventory |
| Inventory counter | Taking counts. | Audits | Audits |
| Bookkeeper | Matching receipts and reading the numbers. A bookkeeper can't order. | Dashboard, Reports, Purchasing, COGS, Labor | Dashboard |
| View only | Looking at everything except wages, without changing anything. | Everything their access allows | Dashboard |
Wages are on the Labor page and need Labor & wages access. By default only owners, Admin, Location manager and Bookkeeper have it.
When you invite someone you can also choose Owner ("Everything, including members and billing") or No access ("Can sign in but sees nothing yet").
Invite someone
In this example, Maria, the owner of Juniper Hospitality, invites Jordan Reyes to take counts at Riverside only.
Open Members. In the sidebar, find the Workspace group at the bottom and click Members. The Members tab lists everyone in the workspace with their role and locations.
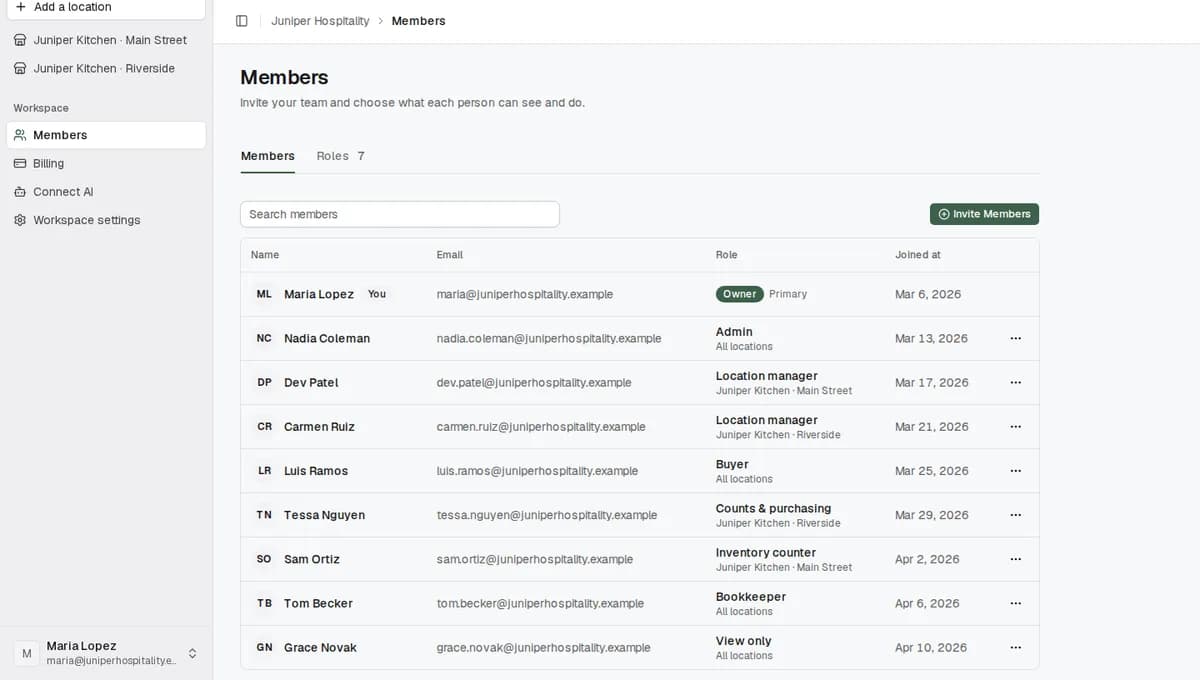
Click Invite Members. The Invite someone window opens.
Fill in their details. Type their First name, Last name and Email. Add a Phone (optional) if you like.
Choose what they get. Click A role ("Pick what they can do and where"). Choose Owner only for a business partner, because owners can manage members, roles and billing.
Pick the role. Under Role, click the role that fits the job. Counts & purchasing is picked to start with. For Jordan, click Inventory counter. A box under the list shows what the role can do, such as "Inventory counter can:" followed by its access.
Pick the locations. Under Locations, choose All locations or Only some.
- All locations includes locations you add later.
- Only some shows a checkbox for each location. Tick the ones they work at. For Jordan, tick Juniper Kitchen · Riverside.
Check what they will see. The What they will see box shows a small copy of their sidebar, as the app will show it. It also lists the page they Opens on, any tool cards, and whether they can use the AI agent. If they have more than one location, use the location menu in the corner of the box to see each one.
For Jordan, the sidebar shows only Audits, the box says it Opens on Audits, and AI agent says "Not shown". If you click Bookkeeper instead, the preview changes to Dashboard, Reports, Purchasing, COGS and Labor.
Click Send invite. You'll see "Invitation sent". Jordan now appears under Pending Invites until he accepts.
Change someone's access
- On the Members tab, find the person and click the menu (three dots) at the end of their row.
- Click Change access. The Access for window opens with the same choices and the same preview.
- Pick a new role, new locations, Owner or No access.
- Click Save access.
You can't change your own access, and nobody can change the primary owner's (the person who made the workspace). Another owner can change yours.
Make your own role
Make your own role when no built-in role fits a job. In this example, Maria makes a "Prep cook" role for the morning prep team.
On the Members page, click the Roles tab. You'll see Built-in roles and Your roles. Each card lists what the role can do, which pages it Sees, and how many people have it.
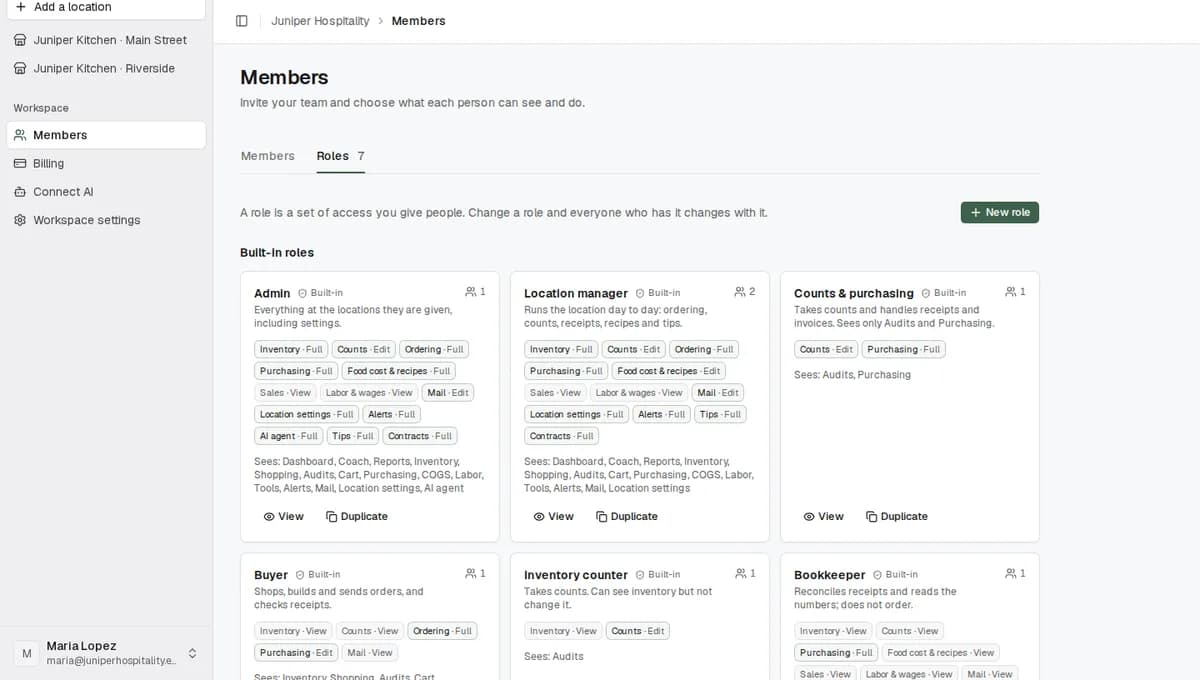
Click New role. Or click Duplicate on the built-in role that is closest, and RestaurantMate copies it as, for example, "Inventory counter copy".
Type a Name, such as "Prep cook". Add a Description (optional) that says who the role is for.
Under What this role can do, set each area to None, View, Edit or Full. The line under each area says what that level allows, for example "Take counts, correct them and suggest new items" for Counts at Edit. Some areas have fewer levels. Sales and Labor & wages only have View. Location settings, Alerts and AI agent only have Full.
For the prep cook, Maria sets Inventory to View, Counts to Edit and Food cost & recipes to View, and leaves the rest at None.
Under Pages they see, tick the pages the role should show. RestaurantMate ticks a sensible set to start with, and you'll see "Showing the default for this role." For the prep cook, that is Audits and COGS. Pages the role can't use are greyed out and say what they need, such as "Needs Purchasing › View", which means the role needs at least View on Purchasing first. To go back to the starting set, click Reset to default.
Check the What they will see preview at the bottom.
Click Create role. You'll see "Role created". Give it to people with Invite Members or Change access.
Need something between two levels? Turn on Fine-tune next to What this role can do. Each area then lists the single permissions behind its levels, and you can tick them one by one.
Change which pages a built-in role shows
You can't change what a built-in role can do, but you can choose the pages it shows. On the Roles tab, click View on the role card, tick or untick pages under Pages they see, then click Save pages. The card then says "(customised)" after its pages.
Edit or delete your own role
On the role's card, click Edit to change it, then Save role. Changes apply to everyone who has the role.
To delete a role, click Delete. If people have the role, pick the role they move to from Move them to…, then click Delete role. Click Keep it to cancel.
What happens next
They get an email inviting them to join the workspace. Their access starts when they accept the invite.
When they sign in, they open on their own first page. The sidebar and the search show only their pages, and only at their locations.
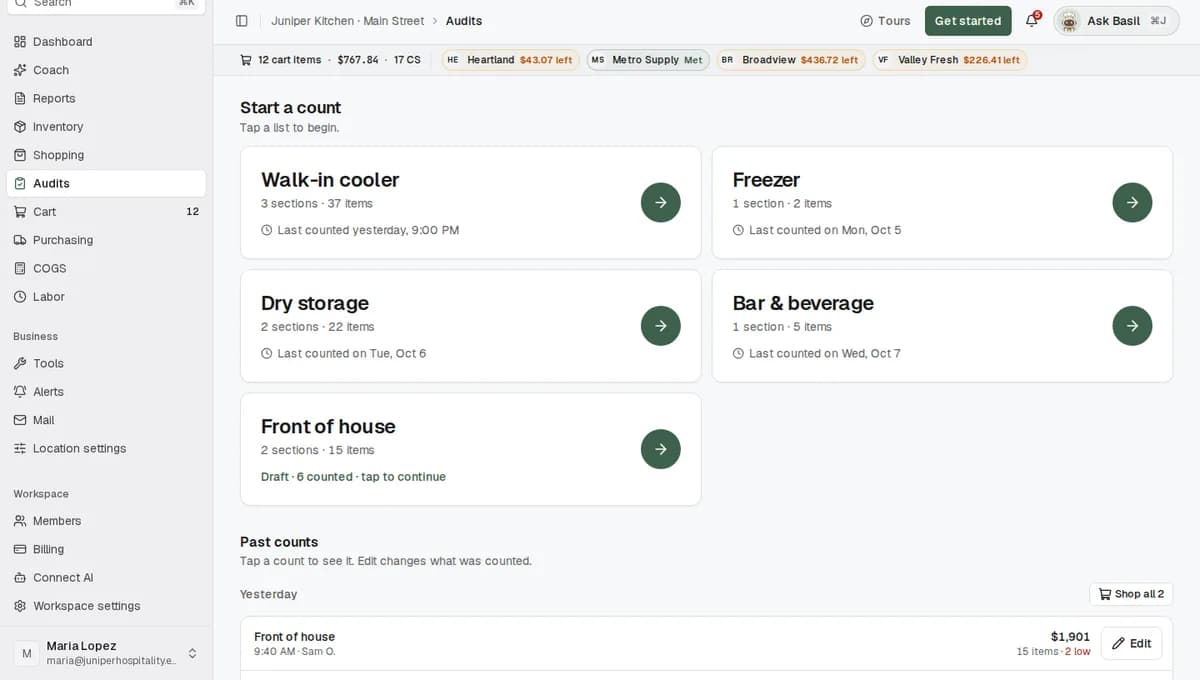
- Hidden pages stay hidden. If someone opens a hidden page from an old link or bookmark, RestaurantMate takes them to their own first page. They never see that page's data or an error. The owner-only pages (Members, Billing, Connect AI and Workspace settings) work the same way.
- Look-only pages say so. On a page they can see but not change, a View only note at the top tells them who to ask.
- Buttons they can't use are greyed out. Hover over one to see what's missing. If they still try, they get a plain sentence, such as "You don't have permission to send orders to vendors. Ask a workspace owner for Full access to Ordering."
- Alerts follow the role. Each person sees alerts only about data their role can see, and alert emails go only to people whose role can see that data. Anyone can mute an alert for themselves. Only roles with Alerts at Full can create or change alerts.
- The AI agent follows the role. Only roles with AI agent access see it. It can do only what that person can do.
Tips
- Start from the closest built-in role. Duplicate it and change one or two areas. That is faster than setting every area by hand.
- Keep sending orders to a few people. Sending orders to vendors needs Ordering at Full. Owners, Admin, Location manager and Buyer have it. Give your cooks a role with Ordering at Edit, and they can fill the cart while a buyer or you send it.
- Use Only some for location managers. Give Dev the Location manager role at Juniper Kitchen · Main Street only, and Carmen the same role at Riverside only.
- Remember new locations. All locations covers locations you add later. Only some doesn't, so add new locations to those people with Change access.
- A custom role that can change Location settings keeps every page. RestaurantMate treats any role with Location settings at Full as a manager's role and shows it every page its access allows.
Troubleshooting
I don't see Members in the sidebar. Only owners see it. Ask an owner of your workspace to make the change, or to make you a co-owner.
There's no Change access option on someone's row. The menu doesn't appear on your own row or on the primary owner's row. Another owner can change your access.
A page in Pages they see is greyed out. The role's levels don't allow that page yet. Read the hint under it, such as "Needs Purchasing › View", and raise that area first.
I can't save my pages. If you untick every page, you'll see "Pick at least one page, or reset to the default." Tick at least one page or click Reset to default.
Send invite is greyed out. If you chose Only some locations, tick at least one. The window shows "Pick at least one location." until you do.
They say they see "No locations to open yet". They have No access, or none of their locations are in the workspace any more. Click Change access on their row and give them a role and a location.
They can fill the cart but can't send it. Their role has Ordering at Edit. That is how cooks fill the cart while someone else sends it. If they should send orders, give them a role with Ordering at Full, such as Buyer.
Someone lost a page they used to see. Since October 8, 2026, each role shows only the pages its job needs. Custom roles made before then may now show fewer pages. Open the role on the Roles tab and tick the pages back on under Pages they see.
Their row says Custom access. Their access was set up the old way, with several roles or exceptions. Click Change access and pick one role to replace it.
They didn't get the invite, or the link doesn't work. Invite the same email again from Invite Members. RestaurantMate sends a new link, and the earlier link stops working.
Common questions
Can my inventory counter see wages? No. Wages need Labor & wages access, which only owners, Admin, Location manager and Bookkeeper have by default. The Inventory counter role shows only the Audits page.
Can a manager run only one of my locations? Yes. Give them the Location manager role and choose Only some, then tick that location. At your other locations they see nothing.
Can someone have one role at Main Street and another at Riverside? No. Each person has one role in the workspace, and it applies at every location you give them. If someone needs a different mix, make a custom role for that job.
Who can send orders to vendors? Owners, plus anyone whose role has Ordering at Full. Among the built-in roles that is Admin, Location manager and Buyer. Everyone else can at most fill the cart.
Can my staff use the AI agent? Only if their role includes AI agent. Owners and the built-in Admin role have it. You can turn it on for a custom role. It always works with that person's own access, so it can't do anything they couldn't do themselves. Connecting ChatGPT or Claude on the Connect AI page stays with owners.